> For the complete documentation index, see [llms.txt](https://docs.rh-webdesign.com/cms-bundle/llms.txt). Markdown versions of documentation pages are available by appending `.md` to page URLs; this page is available as [Markdown](https://docs.rh-webdesign.com/cms-bundle/en/elemente/formulare/contact-form.md).

# Contact - Form

Build your own contact and inquiry forms and receive messages by email

With the **Contact form** you build individual forms directly in the shopping experience – completely without an additional plugin. You create any fields you like, set their order, width and required state, and define which address the messages are sent to.

Typical use cases are contact, inquiry or callback forms. The transmission runs via the Shopware standard, so no additional cookie consent is needed.

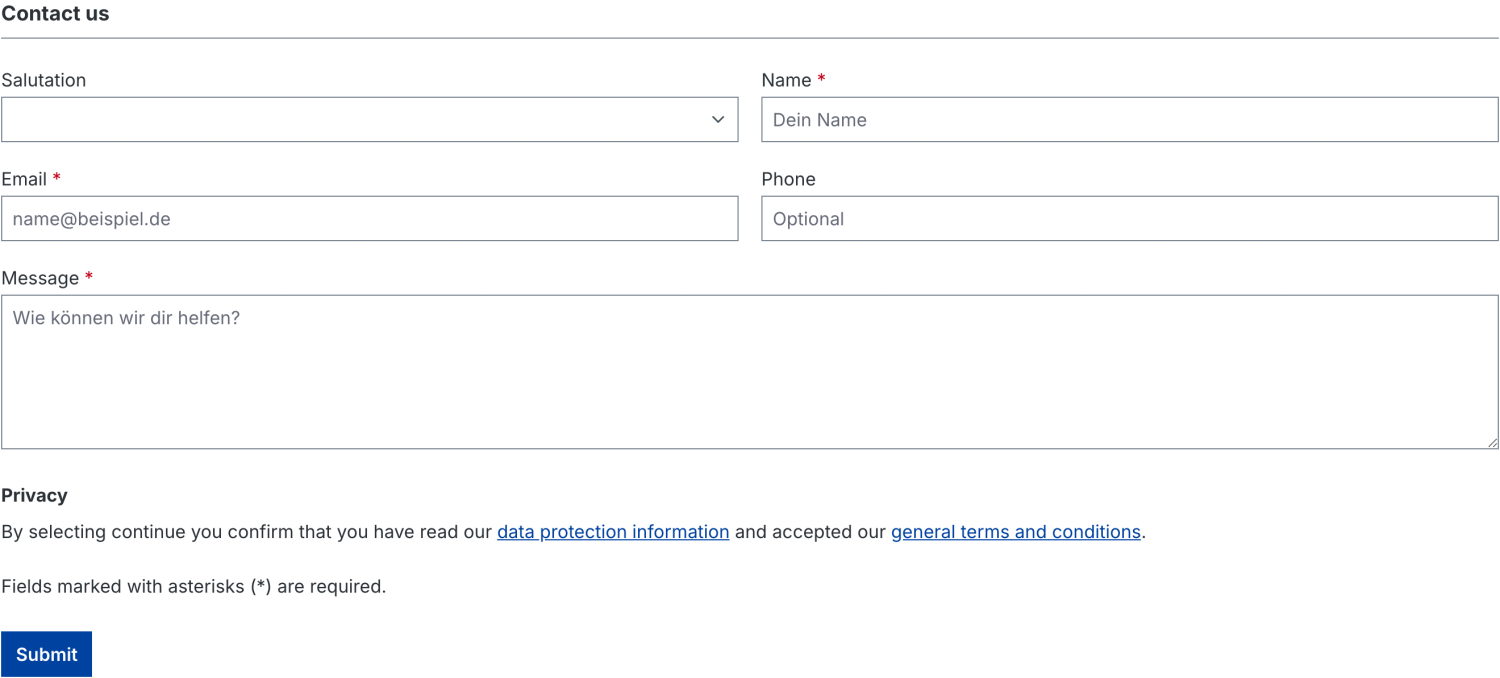
<figure><img src="https://118894700-files.gitbook.io/~/files/v0/b/gitbook-x-prod.appspot.com/o/spaces%2Fhdsmo3ttoHQpDlitXnzA%2Fuploads%2Fgit-blob-7e1d1be9c21829f49d446fe96d6dea5c17b20f5f%2Fkontaktformular-beispiel.webp?alt=media" alt=""><figcaption><p>Example in the storefront: a contact form with salutation, name, email, phone and message</p></figcaption></figure>

### General

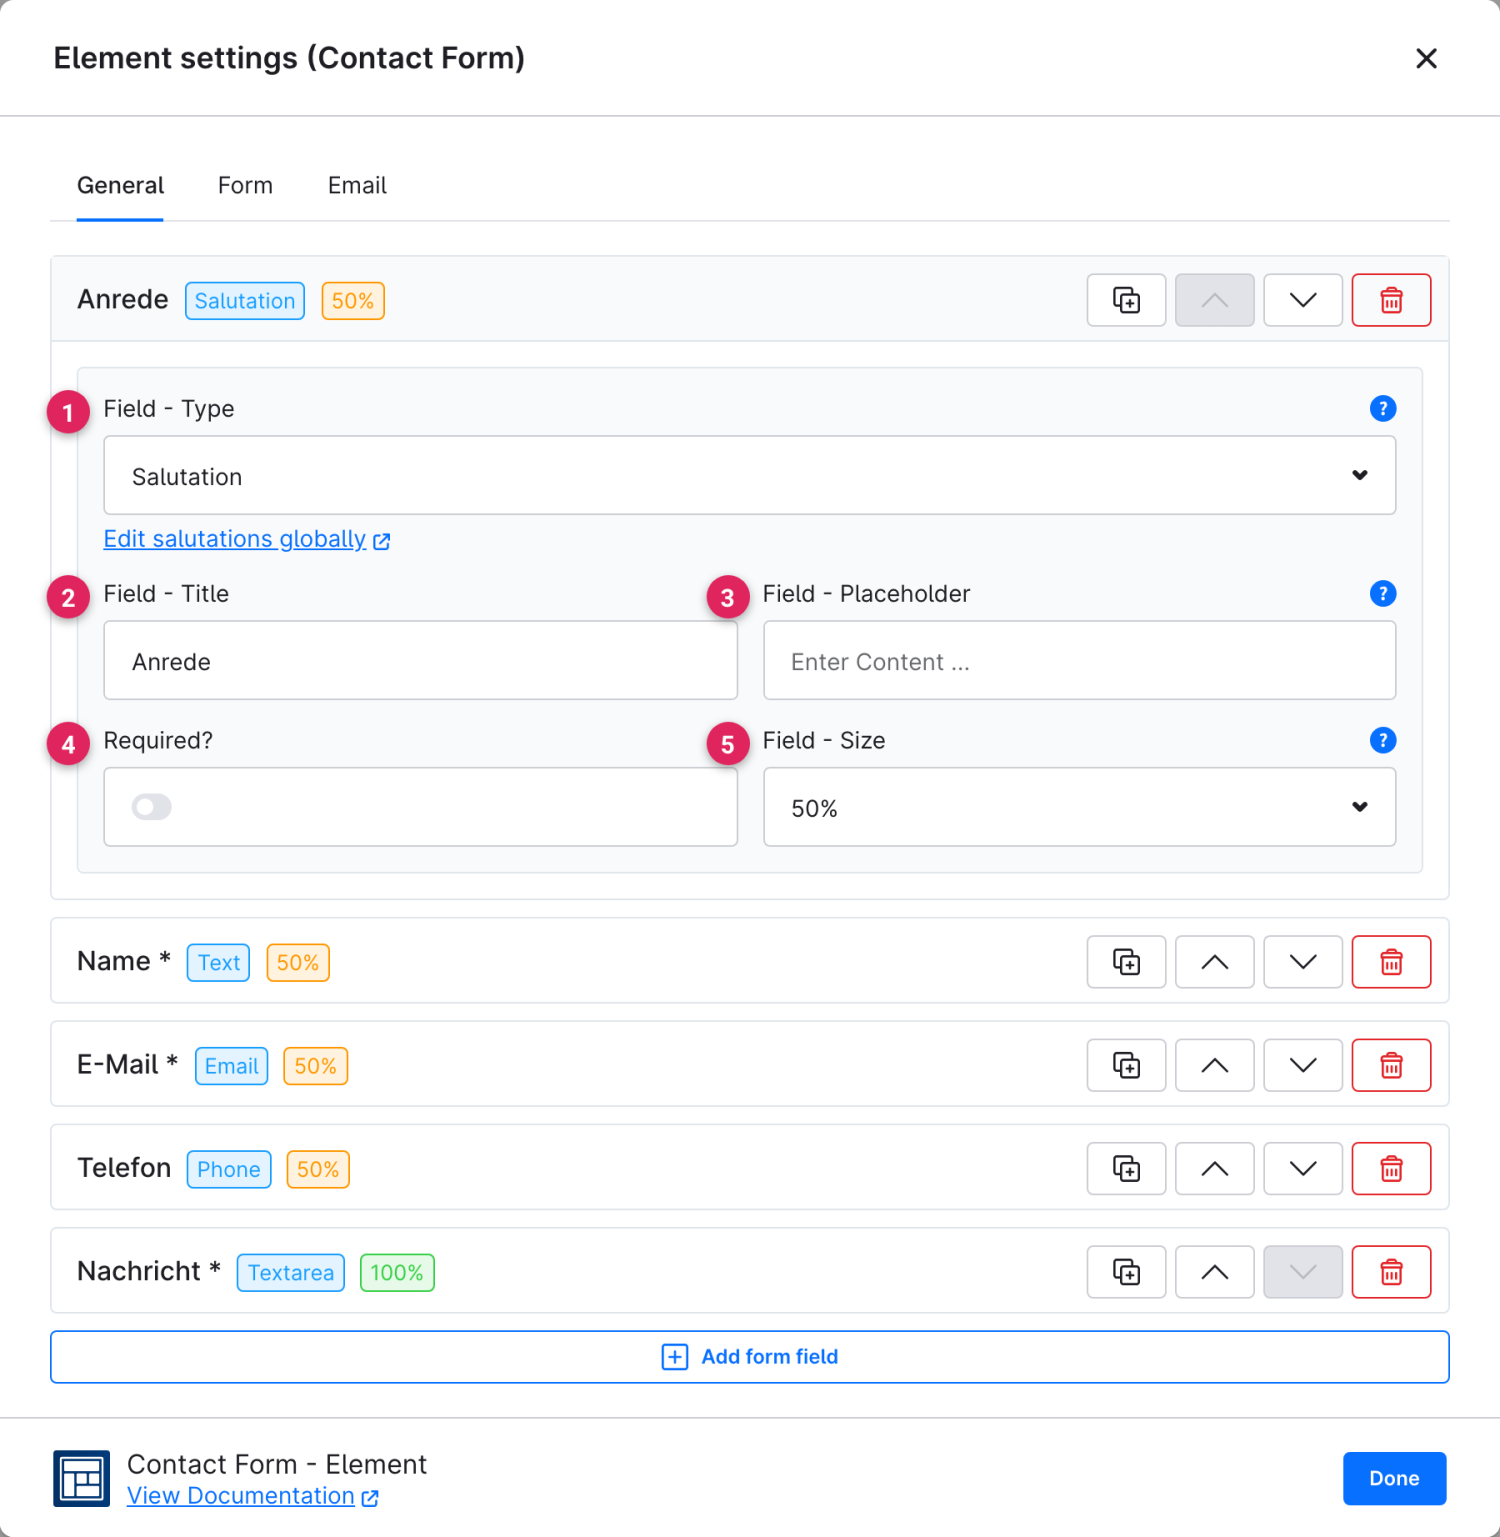
On the **General** tab you build the form field by field. Expand an entry to edit it; using the icons on the right you can duplicate, move or delete fields. With **"Add form field"** you add another one.

<figure><img src="https://118894700-files.gitbook.io/~/files/v0/b/gitbook-x-prod.appspot.com/o/spaces%2Fhdsmo3ttoHQpDlitXnzA%2Fuploads%2Fgit-blob-8fe048fdcc02f4c1ddbe2836e82984897f7006c7%2Fkontaktformular-felder.webp?alt=media" alt=""><figcaption></figcaption></figure>

<table><thead><tr><th width="287">Function</th><th>Description</th></tr></thead><tbody><tr><td>Field - Type (1)</td><td>Type of the field: <strong>Salutation, Text, Number, Phone, Email, Textarea</strong> or <strong>Line break</strong>.</td></tr><tr><td>Field - Title (2)</td><td>Label of the field. It also serves as the technical name.</td></tr><tr><td>Field - Placeholder (3)</td><td>Hint text shown in the empty field.</td></tr><tr><td>Required? (4)</td><td>If enabled, the field must be filled in before the form can be submitted.</td></tr><tr><td>Field - Size (5)</td><td>Width of the field (25/50/75/100 %). Per row, 100 % must be reached to force a line break.</td></tr></tbody></table>

{% hint style="info" %}
The field type **Salutation** uses the globally maintained salutations. **Line break** creates a new row without outputting an input field.
{% endhint %}

### Form

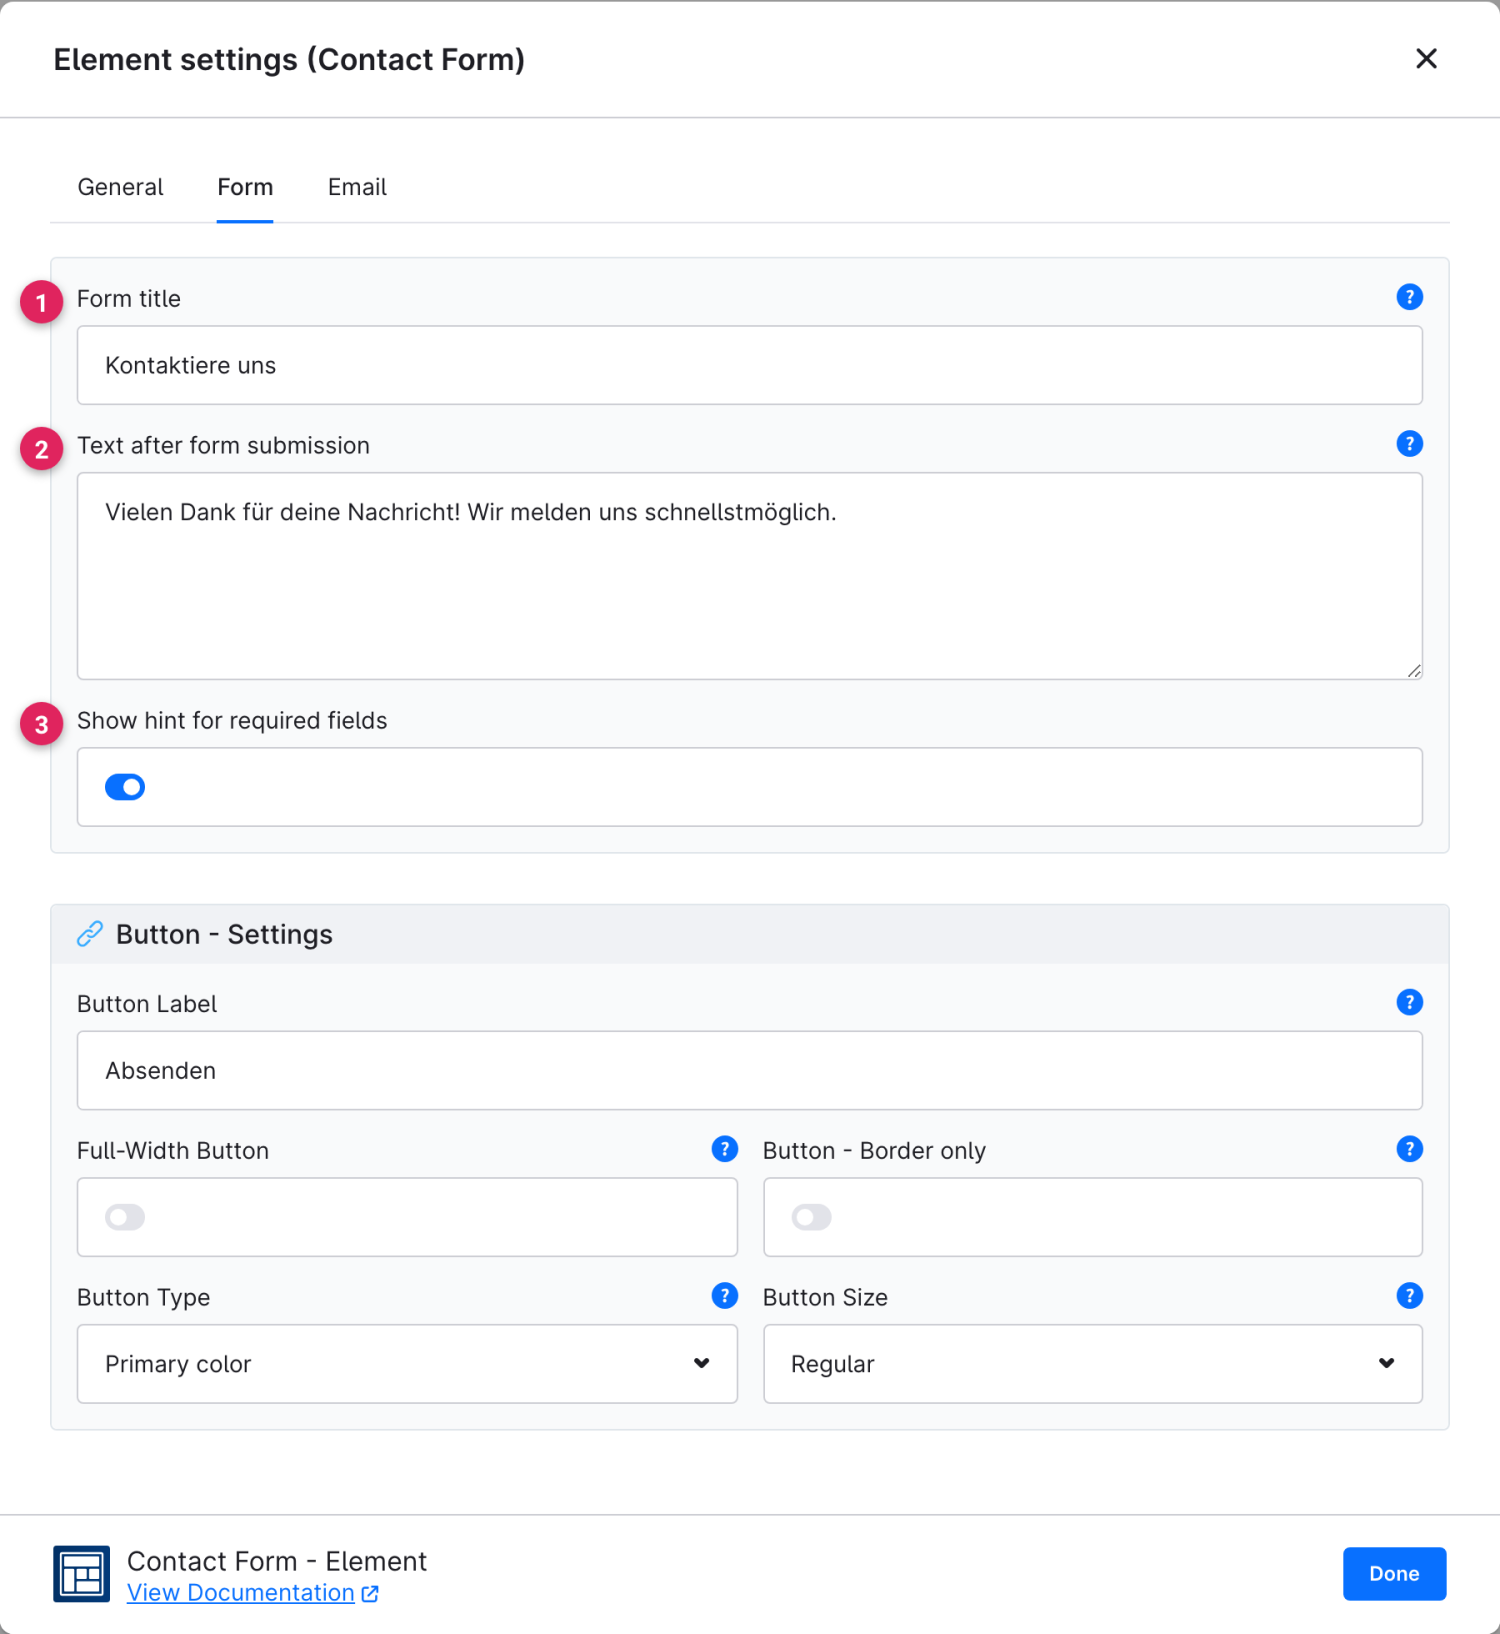
Here you define the general settings of the form.

<figure><img src="https://118894700-files.gitbook.io/~/files/v0/b/gitbook-x-prod.appspot.com/o/spaces%2Fhdsmo3ttoHQpDlitXnzA%2Fuploads%2Fgit-blob-022951190953b8c3adeba921833774f22c19f72e%2Fkontaktformular-formular.webp?alt=media" alt=""><figcaption></figcaption></figure>

<table><thead><tr><th width="287">Function</th><th>Description</th></tr></thead><tbody><tr><td>Form title (1)</td><td>Heading above the form. Leave the field empty to output no title.</td></tr><tr><td>Text after form submission (2)</td><td>Confirmation text shown after a successful submission instead of the Shopware standard message.</td></tr><tr><td>Show hint for required fields (3)</td><td>Shows the note below the form that fields marked with an asterisk are required.</td></tr></tbody></table>

The styling of the submit button is done via the shared building block:

{% content-ref url="/pages/IDCzxbLczQ60ESEzaHLK" %}
[Button](/cms-bundle/en/elemente/konfigurationsbausteine/button.md)
{% endcontent-ref %}

### Email

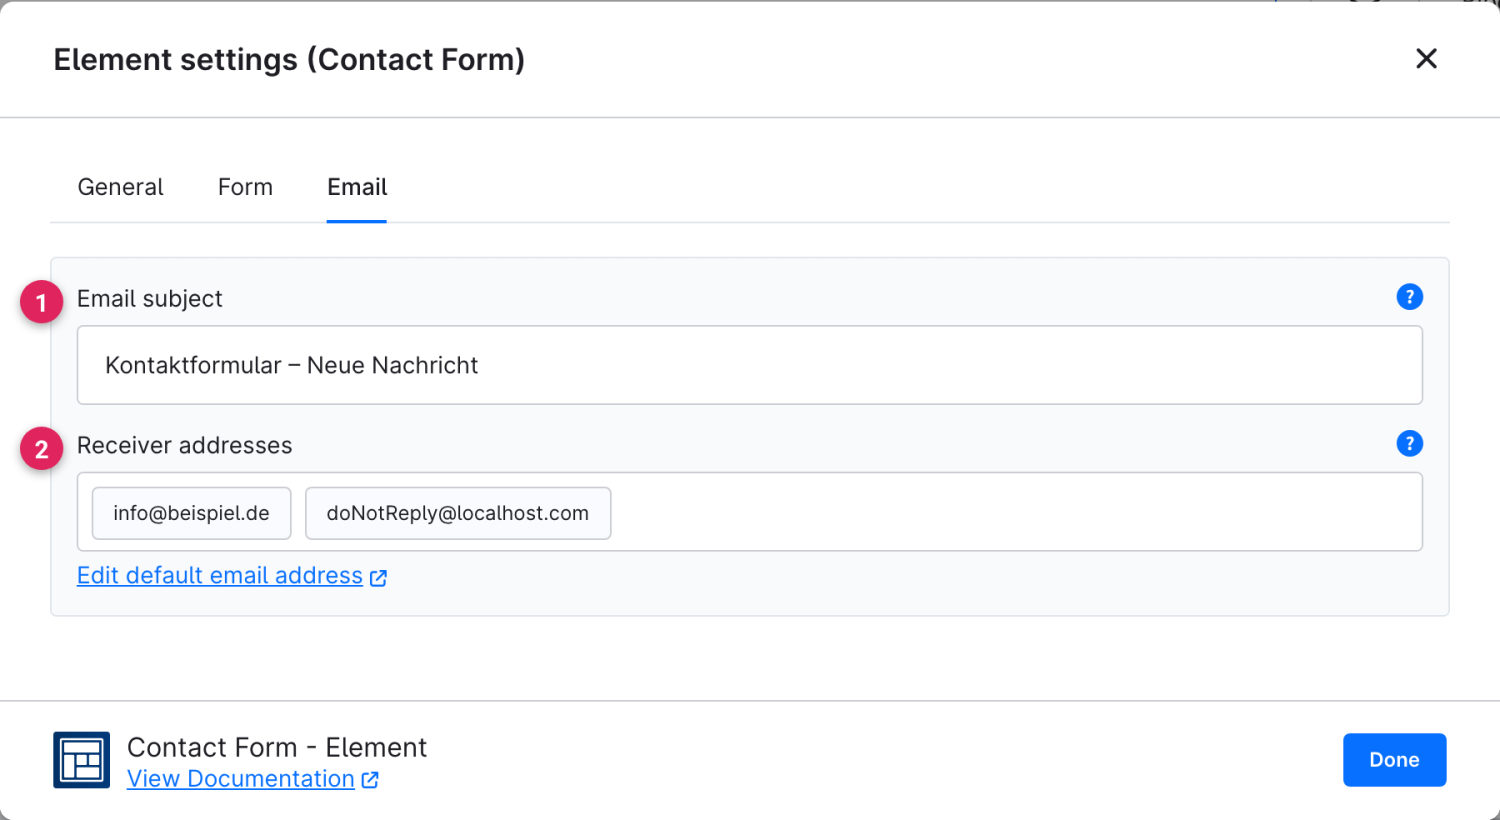
On the **Email** tab you determine how the incoming messages are delivered.

<figure><img src="https://118894700-files.gitbook.io/~/files/v0/b/gitbook-x-prod.appspot.com/o/spaces%2Fhdsmo3ttoHQpDlitXnzA%2Fuploads%2Fgit-blob-b2a752770ada5f9202465882cad25c5ce494a854%2Fkontaktformular-email.webp?alt=media" alt=""><figcaption></figcaption></figure>

<table><thead><tr><th width="287">Function</th><th>Description</th></tr></thead><tbody><tr><td>Email subject (1)</td><td>Subject with which the message arrives in the mailbox.</td></tr><tr><td>Receiver addresses (2)</td><td>One or more addresses the form is sent to. Without your own entry, the shop's default email address is used.</td></tr></tbody></table>